...
| Info |
|---|
This article applies to SharePoint Essentials Toolkit v6.1.3.0 and later |
Overview
Once you have registered the SharePoint or SharePoint Online sites and site collections with the SharePoint Essentials Toolkit, you can run reports as needed. The most common types of reports are permission based. The SharePoint Essentials Toolkit contains the following permission reports:
- Site Permissions
- List Permissions
- Unique Item Permissions
- Site Collection Administrators
- Unique Item Comprehensive Permissions Report
- Comprehensive Permissions Report
...
- Permission Matrix Report
- SharePoint Groups
Views Concept
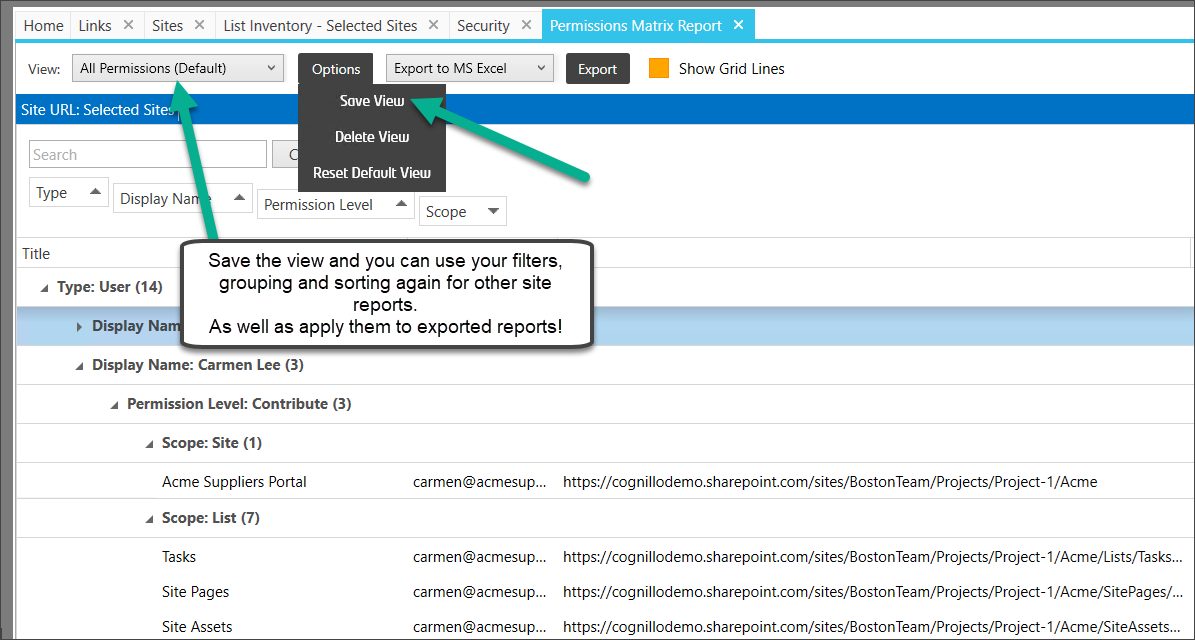
Within each of the above reports, you can create additional 'Views' which can filter group and sort the report, then 'Save' the View, just like a SharePoint View!
Example: Filter the SharePoint Groups report by a specific user to see what groups that user is a member of.
Step-by-Step Guide
These reports above are predefined permissions reports, which utilize the permission information retrieved from the sites, after executing the permissions job to retrieve the data needed.
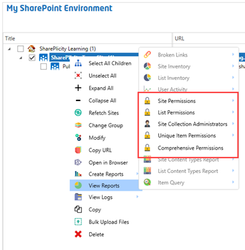
To create a Permission report, you need to select the site, site collection or multiple of themsites, right-click and choose “Create Reports.”
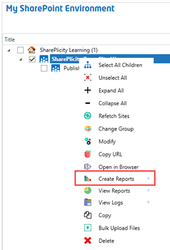
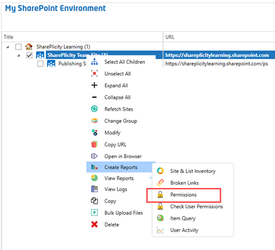
From the “Create Reports” “Create Reports” menu, select “Permissions“Permissions.”
The “Create “Create Permissions Job” Job” screen will then load, where you can set various properties as needed. Firstly, set the “Job Name”“Job Name”, then ensure that “Site URL” “Site URL” is the one you selected, or choose from the drop-down of options. You can also check the box for “Multiple Sites” “Multiple Sites” allowing you to choose multiple site collections and subsites as needed.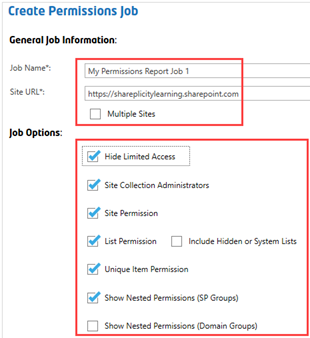 sub-sites as needed.
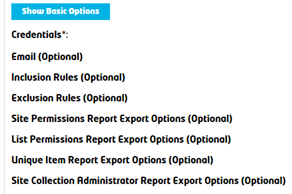
Select the options and types of information you wish to capture:
| Info | ||
|---|---|---|
| ||
For a definition of each option, please check out our User Guides. |
Once you have changed the propertiesselected your options, you can then click the “Run Now” “Run Now” button. The permission job will then execute displaying the steps it is performing.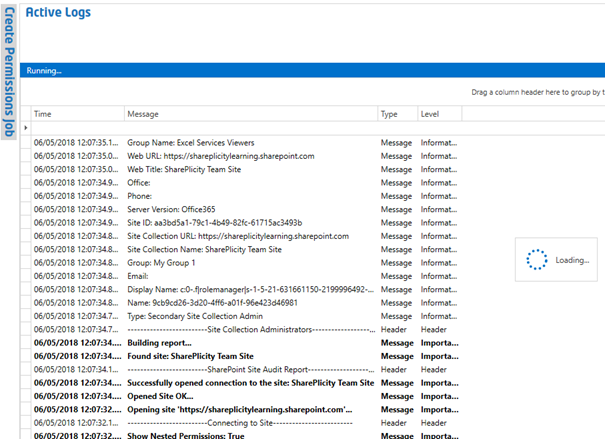
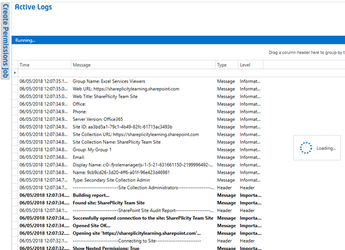
Upon completion, you can then choose “OK” or “View Log Details”“OK” or “View Log Details”. Simply press the “OK” “OK” button, this will return you to the log view, but will now display report button that can be clicked to access specific report types.

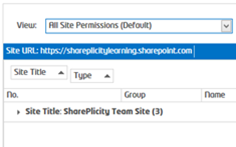
To view a “Site Permissions” “Site Permissions” report, click the corresponding button.

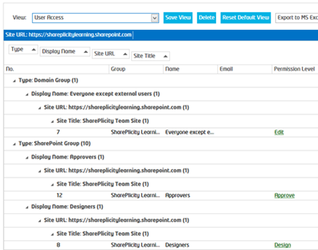
By default the report will group the values by the “Site Title”, however, this can be changed as needed.
Expanding the view displays nested grouped values which can also expand, to display further information.
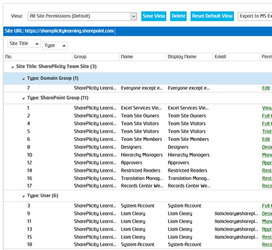
Above the results, there is also a drop-down that allows you to change the current view to some predefined options that group the values are different making it easy to see the results in the way that you need.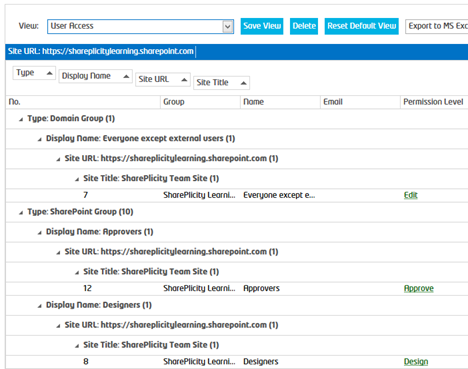
Now that the “Permissions Job” “Permissions Job” has run, the reports that are available from the “View Reports” “View Reports” menu are now also available. Right-click on the single site/site collection or select multiple sites/site collections, and choose the “View Reports” “View Reports” item, this will then display the reports that are available, those that are not available are grayed out from use.
Clicking the “Site Permissions” “Site Permissions” item then displays the data snapshot that can be used for this report.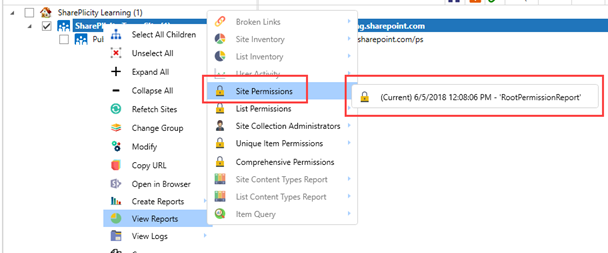

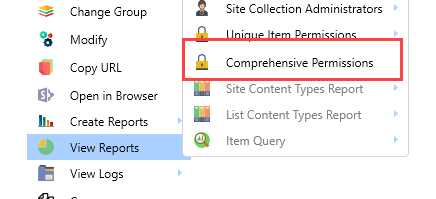
Clicking the chosen data will then send you to the same report that was viewed earlier. For a more complete Permission Report, the "Comprehensive Permissions" report can be ran. From the "View Reports" menu, click the "Comprehensive Permissions" link.

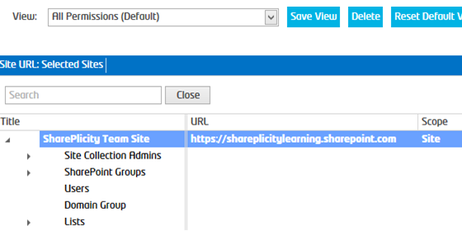
The report will then be displayed grouping the site data into a hierarchy that can be expanded to drill-down deeper.
In fact, you can drill-down through each user, group, list or even library to see all permissions. Clicking on a value in the left tree structure will render more information and details for that container you have selected.
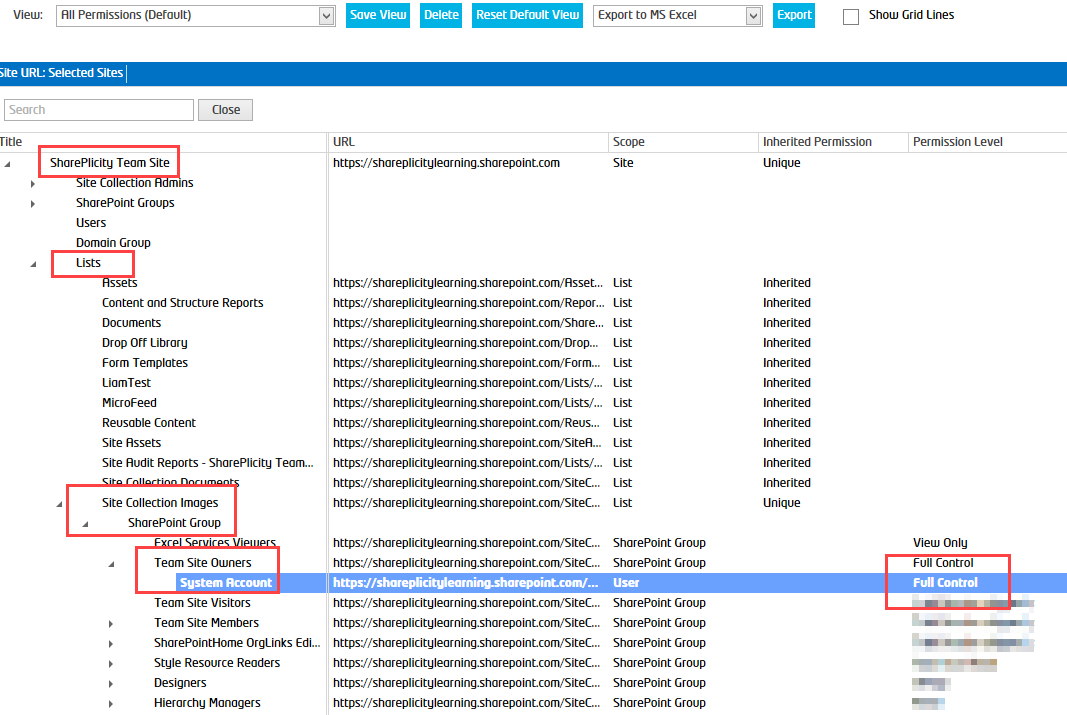
The "Comprehensive Report" displays a much richer complete report, with an which is 'pre-structured' and therefore easier to navigation structurenavigate, allowing you to view all permissions at every level of the site collection or subsite, subsite, list and item or folder level.
When creating However, the report jobs, within the creation screen, you can set specific properties by selecting the “Show Advanced Options”.
Each of these categories Comprehensive report does not have as many customization options such as changing grouping and filtering as the other reports.
Filters
In the Site, List, Unique Item, Permissions Matrix, SharePoint Group reports, you can also apply filters easily:
Example: Only display permissions for a specific user
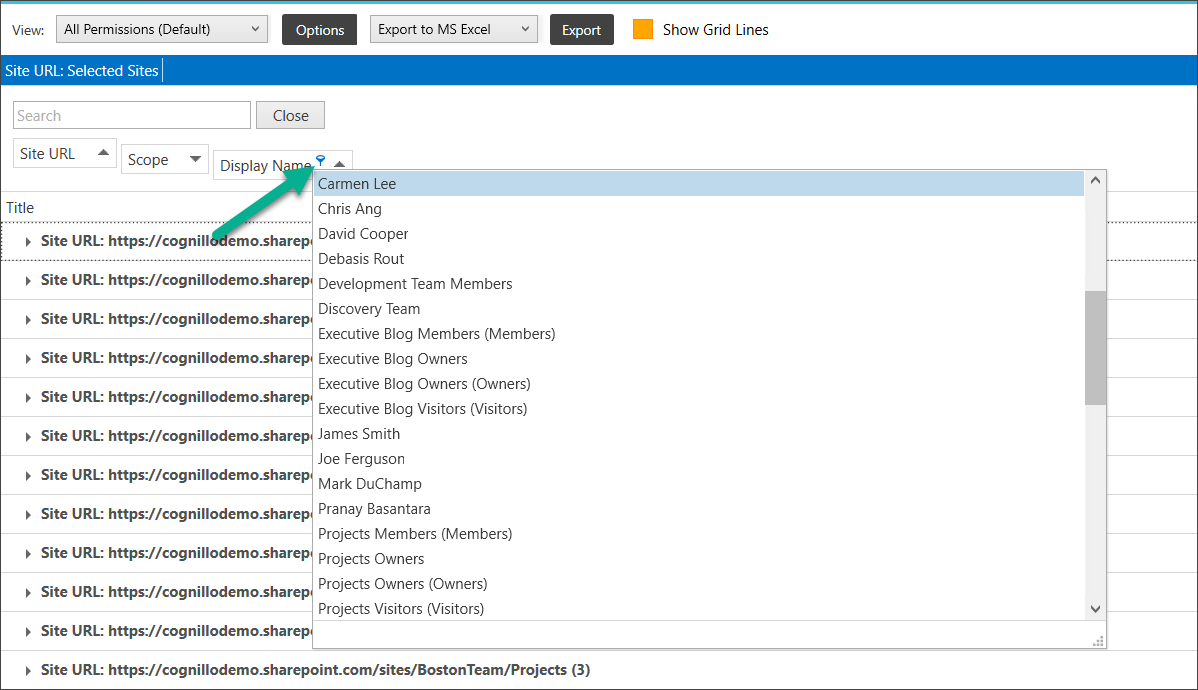
Alternatively, you can also use advanced filtering by right clicking a column header
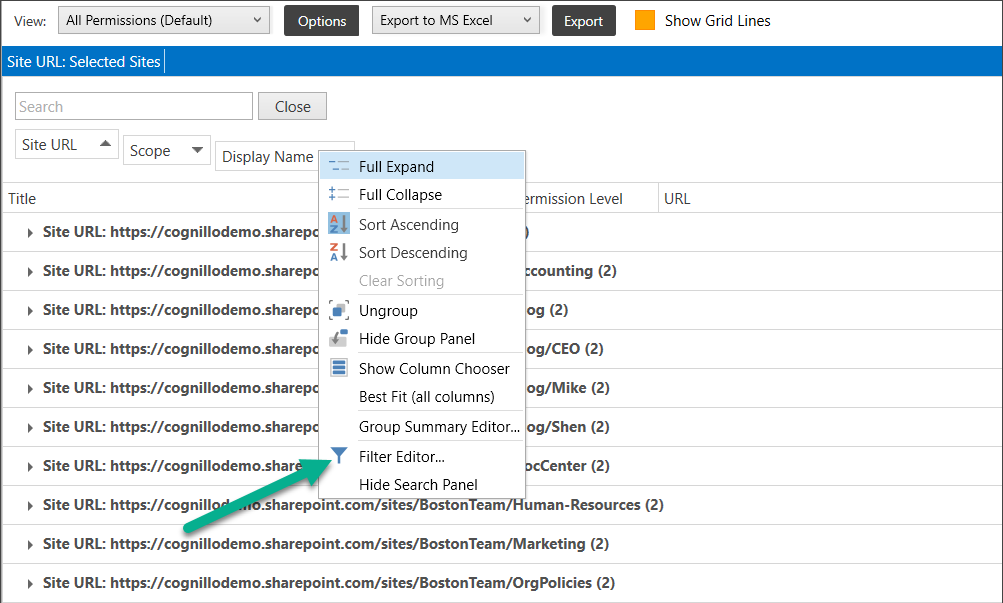
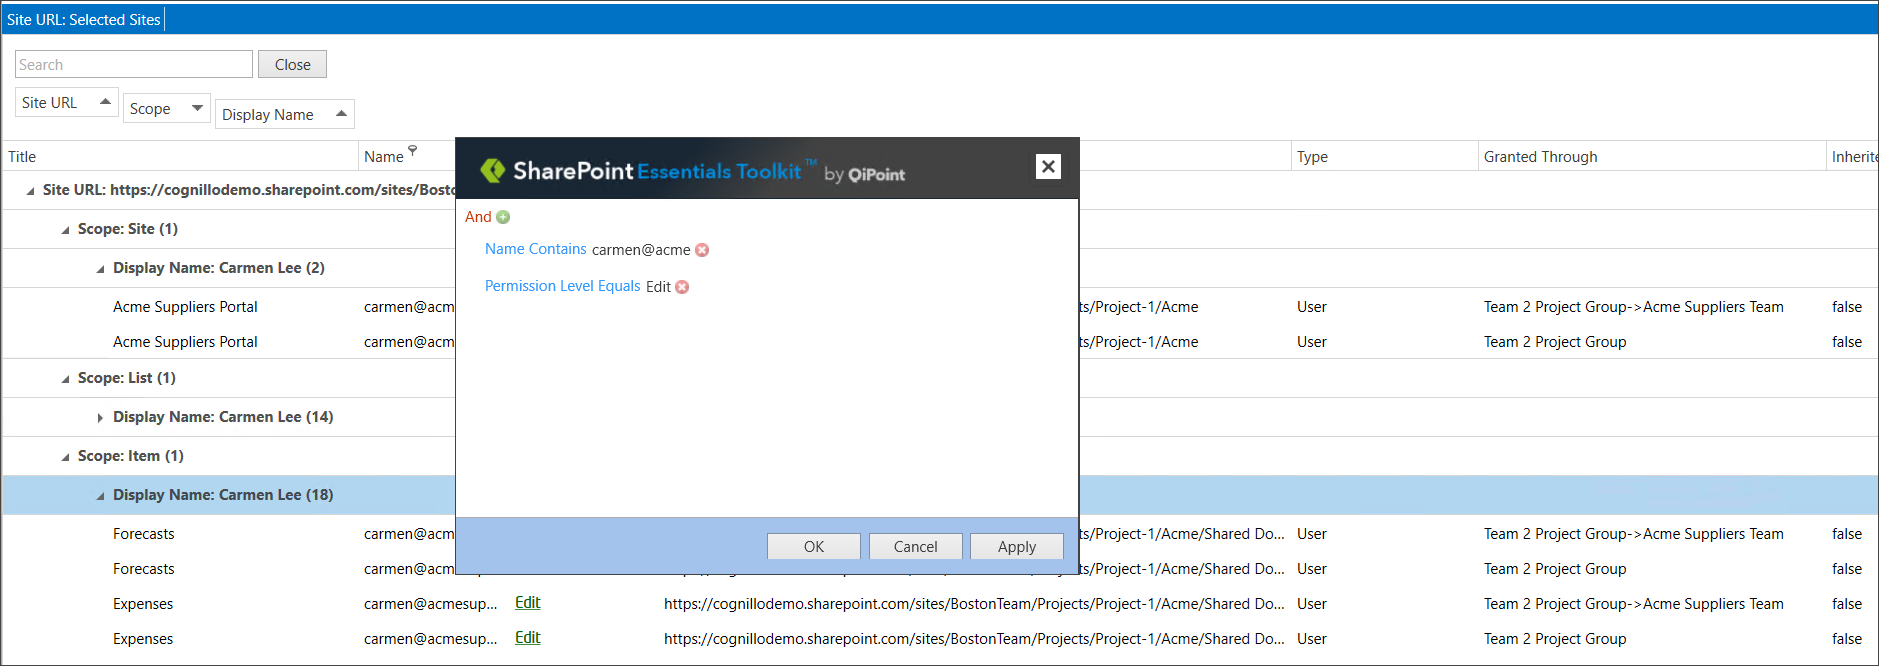
And then build a more useful query
Grouping
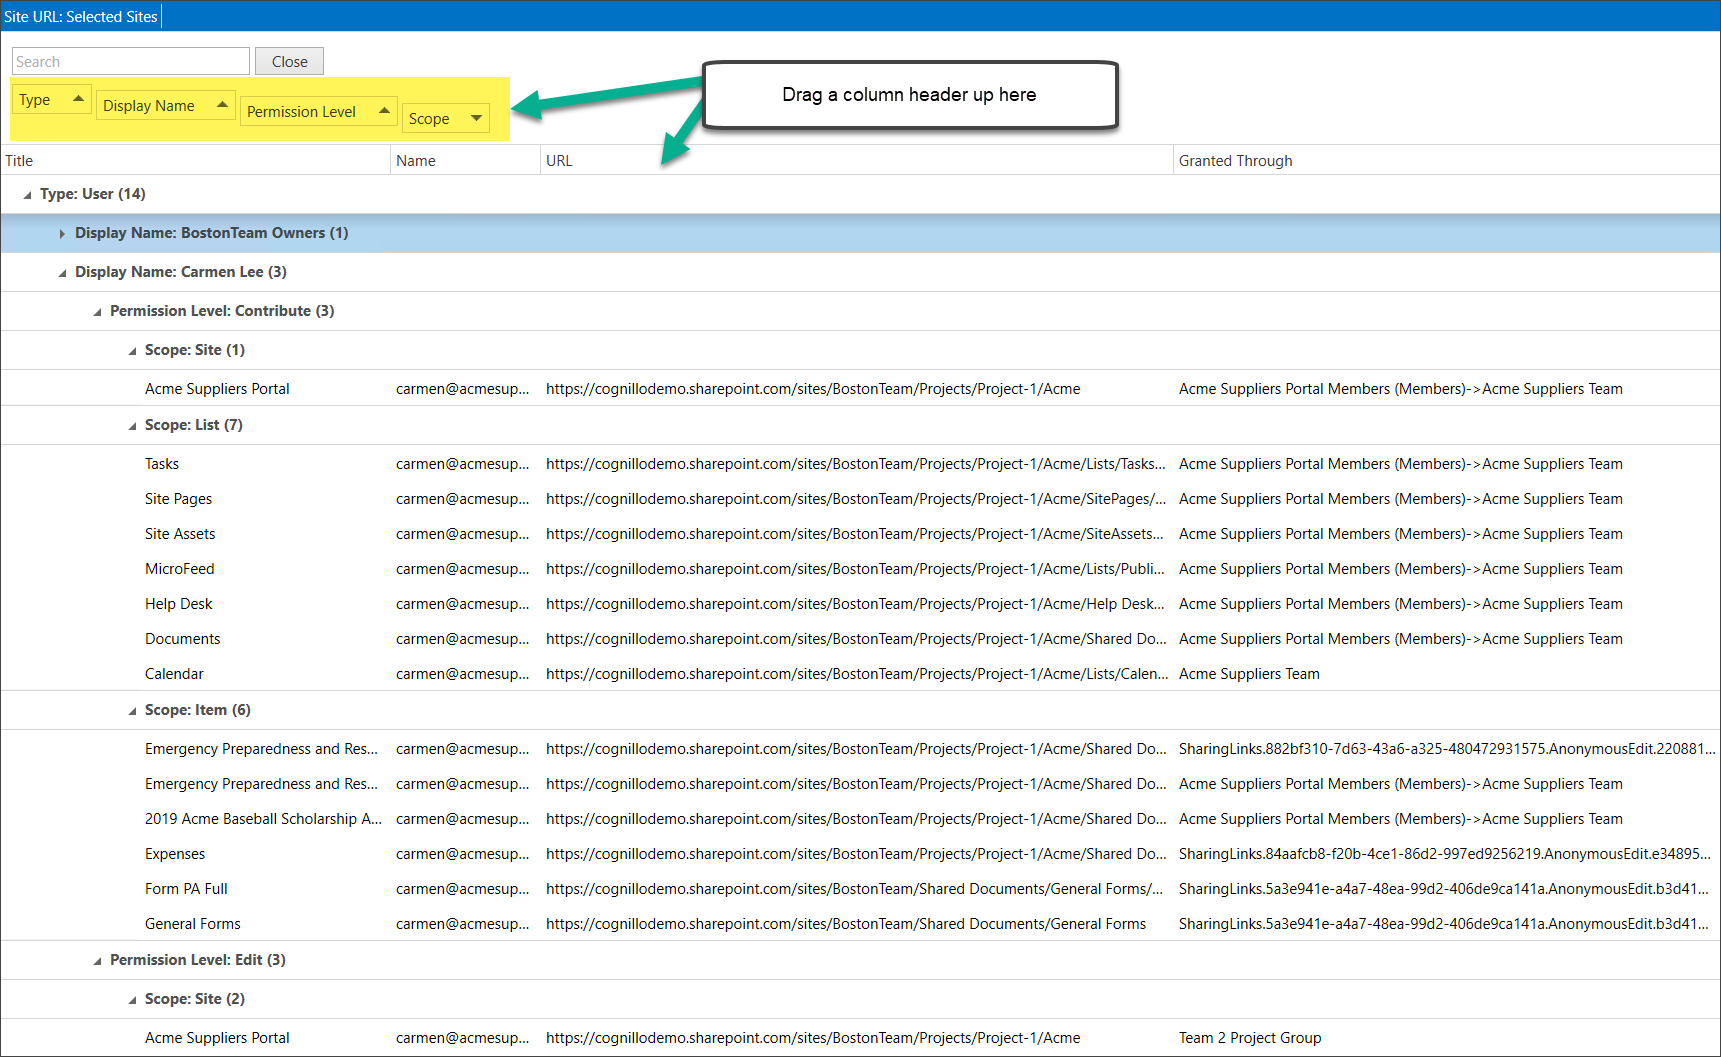
Drag and drop the header to the grouping panel to group by that property.
Each of these groupings can be expanded and modified as needed, allowing locations to be included, excluded, define export options as well as emailing settings for all reports. Creating reports is easy and simple, by requiring only the minimal information to get started, but also allowing great filtering and control over the results.
Example, below I dragged 'Type' and then 'Display Name' to the front to see everywhere users have access, I then grouped by Permission Level to see their corresponding permissions
Views
As mentioned earlier, you can use views to customize your reports:
Related articles
...