- style
How to Report on Broken Links in SharePoint
Author: The content of this macro can only be viewed by users who have logged in.
This article applies to SharePoint Essentials Toolkit v6.1.3.0 and later
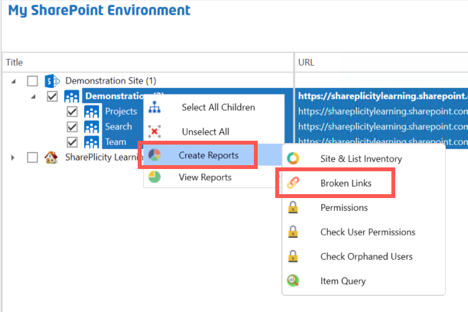
With the SharePoint Essentials Toolkit, you can run various reports to help identify links that need to be modified or updated. This is achieved by using the Broken Link Manager component within the toolkit. To check for broken links, first select the site collections or sites that you wish to scan in the “My SharePoint Environment” screen, then right click and choose the “Create Reports” option, then “Broken Links” item.
You will then be redirected to the job configuration screen where you can select more site collections or sites, or simply validate the correct ones are selected. This is done by selecting the dropdown for the “Site URL” and ensuring it is set as needed.
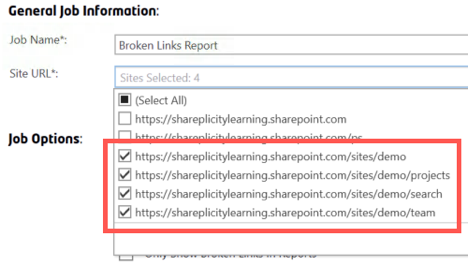
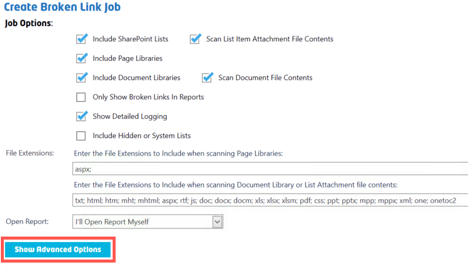
Now the various properties need to be set, to ensure content is scanned and checked for broken links. Checking “Scan List Item Attachment File Contents” and “Scan Document File Contents” will check inside file content for broken links. If you do not select this, the content within the files itself will not be checked.

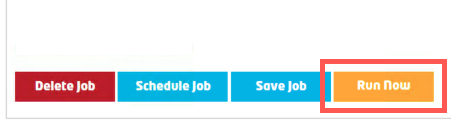
Once you have set the configuration that you need, you can then press the “Run Now” button.
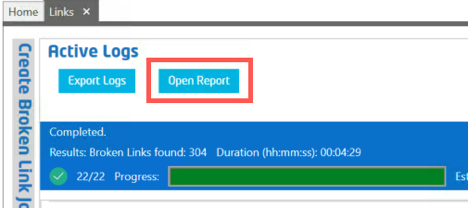
The report job will then begin its process by configuring the job, and then it will start the scanning process. Results will be displayed in real-time as it scans. You will be able to see instantly any broken links as it works through the content locations you selected.

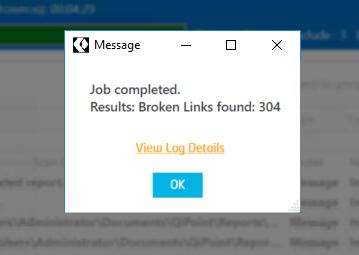
Upon completion you are notified of completion as well as the number of broken links found. Pressing the “OK” button returns you back to the results screen with the “Open Report” link now being visible.
Viewing Broken Link Reports
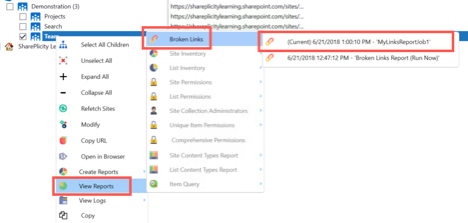
The report can be viewed instantly after clicking the “Open Report” button, or if you need to run this again later, from the “My SharePoint Environment” dashboard, right clicking the chosen location, displays the menu for viewing reports.
To view the most current “Broken Link Report”, right click the location, choose “View Reports”, select “Broken Links”, then select the “(Current)” tagged option, or if you wish to view previous results select the chosen date.
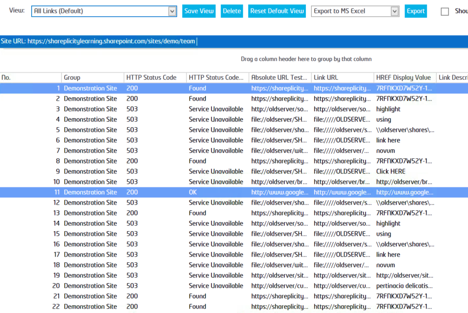
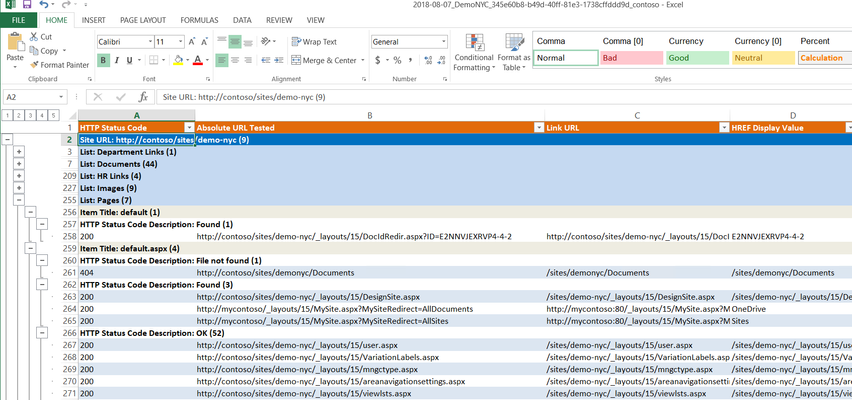
The default “All Links” view is then displayed, listing all results including valid and invalid links.
The current view can be changed by selecting the required view from the dropdown.
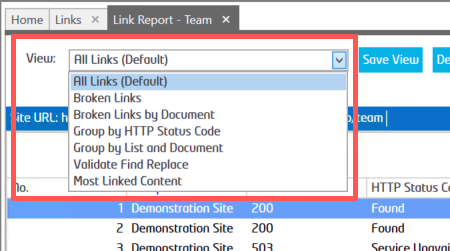
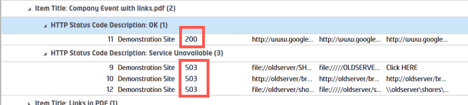
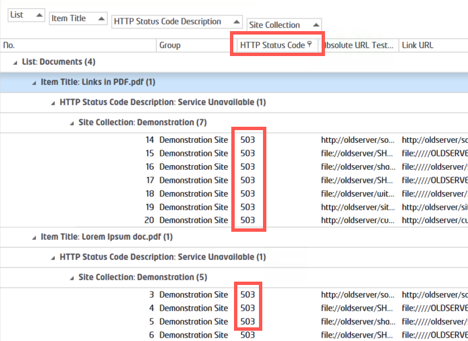
Changing the view to “Broken Links by Document” removes results that are valid links. The results are grouped by the SharePoint List/Library called “Documents” and then grouped by the item/document/web page itself, which in-turn displays the broken links within the content itself. This will include all the broken links found.

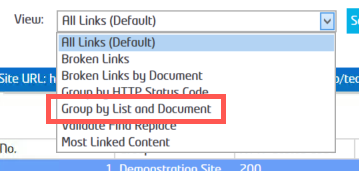
The best view giving an all-round view is the “Group by List and Document” option. To change to this, simply select this from the dropdown of views.
You can see an expanded set of results showing not just link failures, but all links found even if they are still valid.
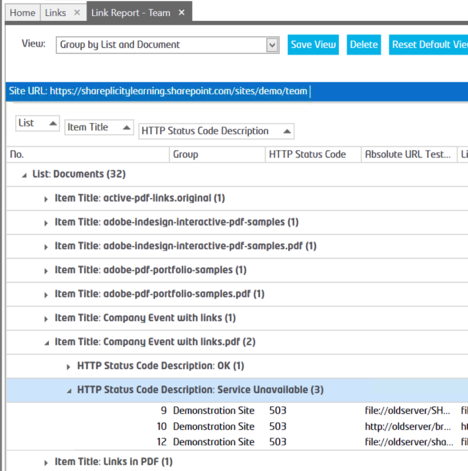
Expanding the result rows, gives you a clear picture of the links found within the content, including all valid and working ones.
Grouping, Sorting and Filtering Broken Link Report Results
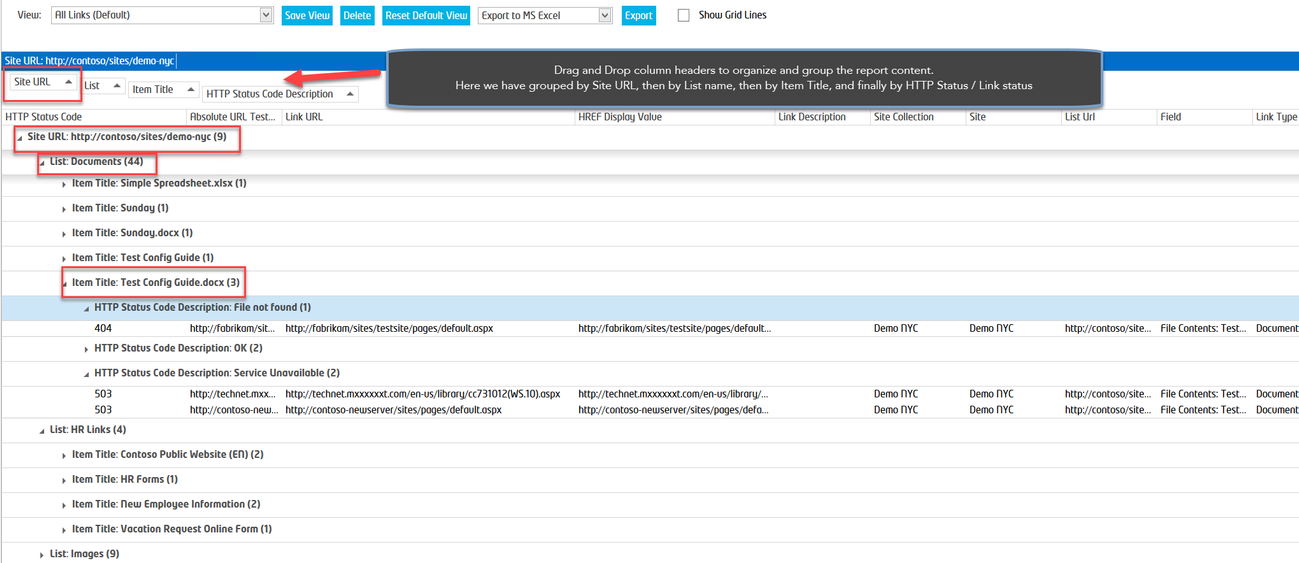
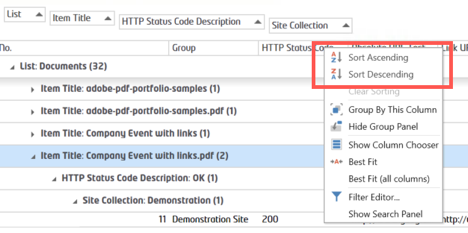
As with any view within the “SharePoint Essentials Toolkit”, the columns can be grouped further, or filters can be applied. Dragging any of the header columns will group the results further.
Dragging the “Site URL” column, then renders them groups by four columns.
Any of the columns can also be re-sorted to what is needed, simply by right-clicking the header column and choosing the desired sort option.
Each column can also be filtered by either using the “Filter Editor” or “Search Panel”. Right-click the “HTTP Status Code” column, then select “Filter Editor”.
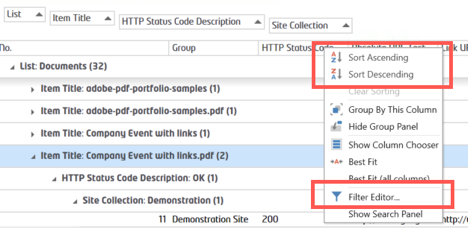
The “Filter Panel” is then displayed, pre-populated with the chosen column.
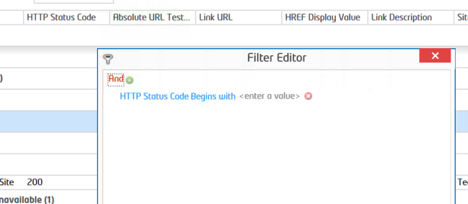
Clicking on “Begins with”, will display a larger option of filter options.
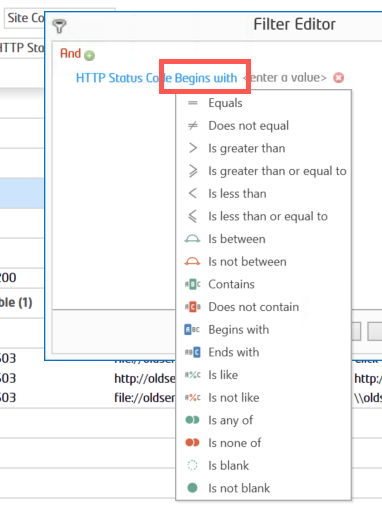
The required value can then be added, and the filter saved.
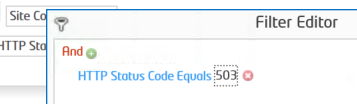
The results will then be modified to the required filter.
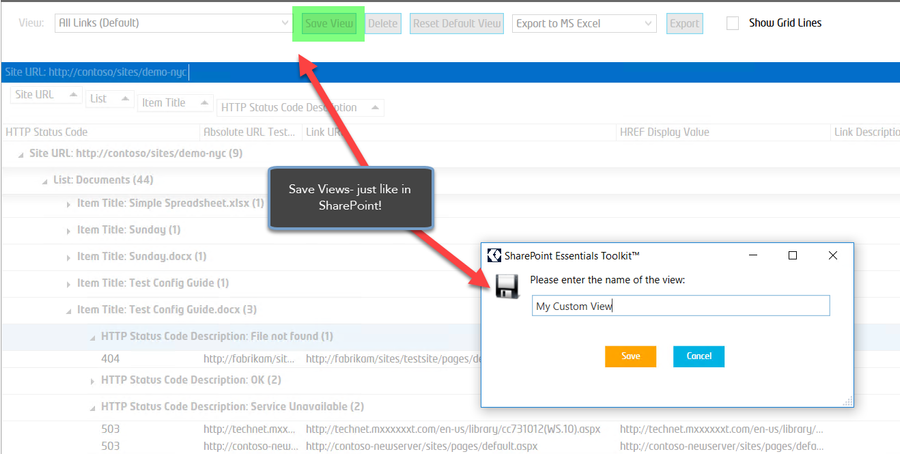
TIP: Filters can be used on any column, and create filters like 'All External Links' or 'Links pointing to Old Environment', or 'Sharing Links'. Click 'Save View' to save the filters and groupings you applied!
Save Views
Export Report
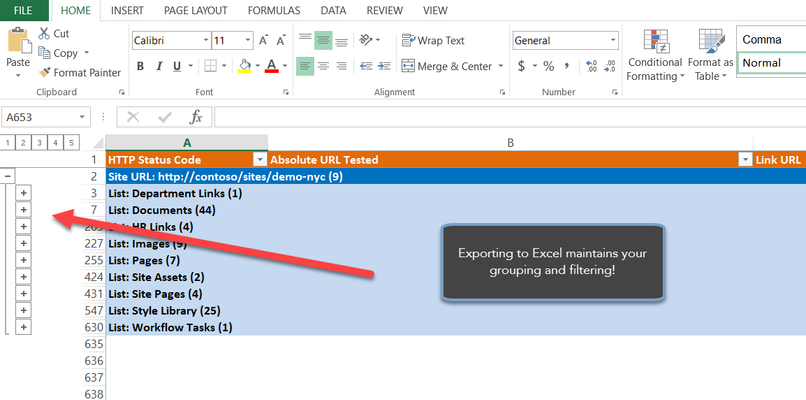
You can then export to SharePoint or MS Excel, this could be done on a schedule as well.
Exporting the report to MS Excel will retain the sorting, filtering and grouping, awesome!
Nice!
Automatic Emailing the Reports
Running the reports great, however you can schedule the job to automatically email the results to site owners on a specified schedule. During the job creation, press the “Show Advanced Options” button and then set the email(s) to use, as well as the format to send such as Excel.
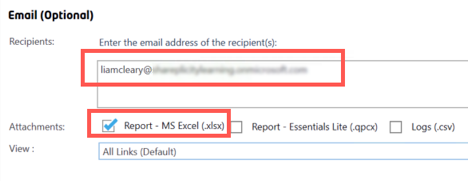
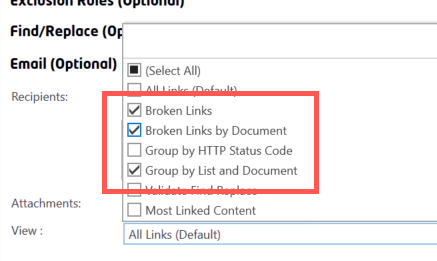
Select the desired “View” that you want to send in the email, you can select specific ones or all of them as needed.

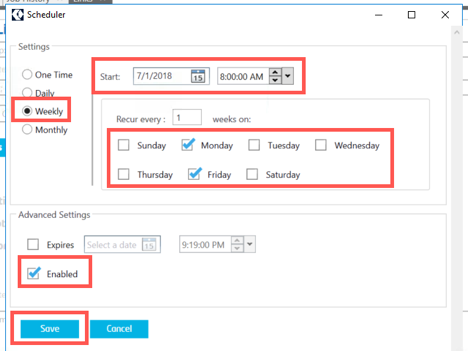
To schedule the job, now choose the “Schedule Job” option.

The scheduler will then load, where you can set the required schedule, ensuring it is enabled.
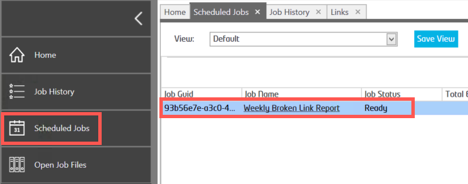
Once saved, this job is then visible from the “Jobs” navigation, then “Scheduled Jobs” from the left navigation.
Using the Broken Link Manager features are simple, easy and can help in controlling content links, especially when migrations are performed, or content is moved or even deleted.
Related articles
©2018 QiPoint
2500 Plaza 5, 25th Floor
Harborside Financial Center
Jersey City, NJ 07311
http://www.qipoint.com
Microsoft, Windows, SharePoint, and the SharePoint logos, are either registered trademarks or trademarks of Microsoft Corporation.