- style
How to Fix Broken Links from a File Share Migration
This article applies to SharePoint Essentials Toolkit v6.1.3.0 and later
With the SharePoint Essentials Toolkit, you can fix links after a migration from File Shares to SharePoint or One Drive.
This is achieved by using the Broken Link Manager component within the toolkit.
First, add the Site Collection(s) where the 'File Share' content was uploaded/migrated to:
see Getting Started with SharePoint Essentials Toolkit
Step-by-step guide
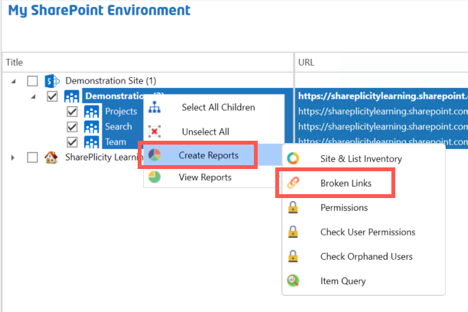
- Select the sites that you want to process
- Right click and select 'Create Reports→Broken Links'
All of the selected sites will be listed under Site URLs:
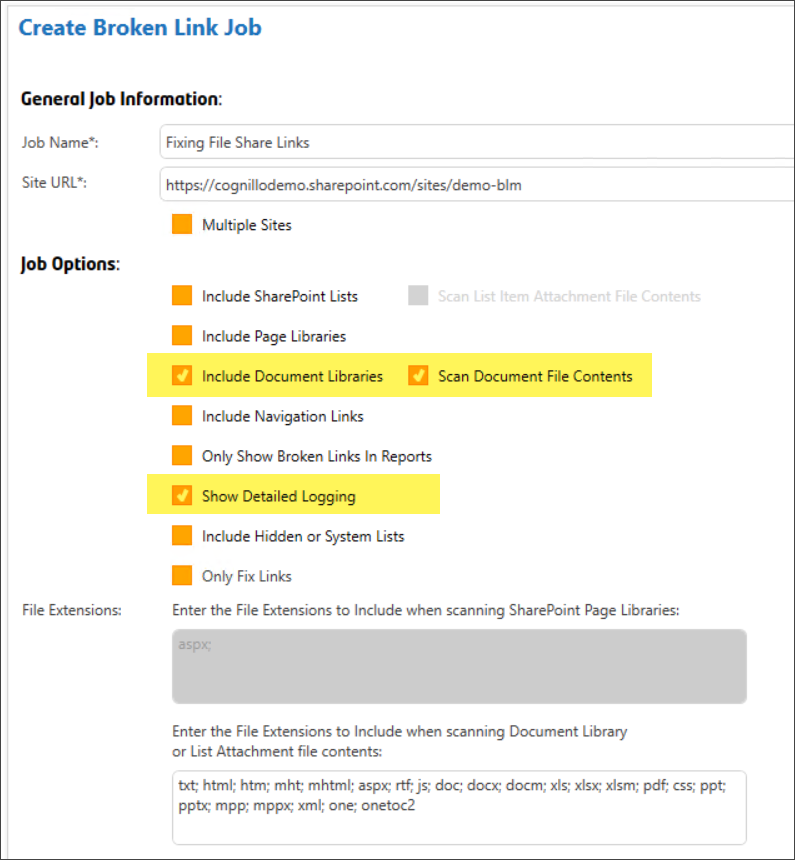
- In the Job Options section, from a File Share migration, you likely only need to fix the links from uploaded documents in Document Libraries. You could change the options as needed but I have selected below:
- Click "Show Advanced Options"

- Scroll down to expand "Exclusion Rules"
- Now we need to only include File Share Paths as we do not want to change standard HTTP or HTTPS links.
- In the section "URLs in Content", remove everything and type
http:*;*/*
It should appear like this:
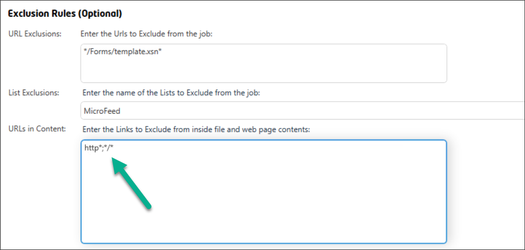
This will exclude any http and https links as well as relative paths.
IMPORTANT
Add any other exclusions here. For example if you have some file shares which will still be used and you DO NOT want to change, you need to specify them here so that the tool does not affect the slashes in the Find/Replace. - Open the "Find/Replace" section
- Enter the file share path of server as an entry, example:
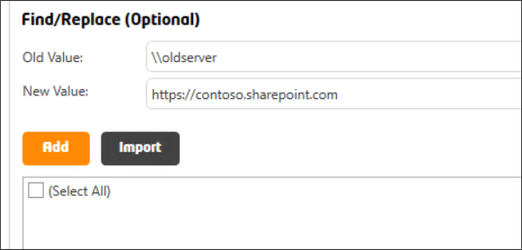
- Click "Add" button
- Now enter all folder restructuring you may be doing (optional)
Example: If you need to move this file share to a new Site Collection with URL https://contoso.sharepoint.com/sites/acc, the first rule will handle the top domain/host name portion,
below I will add the entry to change the remaining path structure to the new location, which is in the "Documents" library at /sites/acc/shared documents/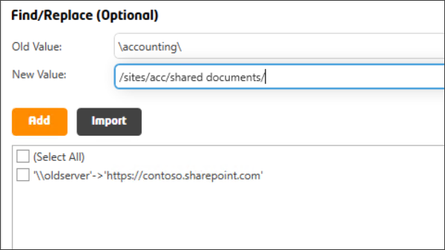
- Click "Add" button
Since the path slashes are different, there is a safety mechanism alerting us of this, click OK to continue as we want to change path slashes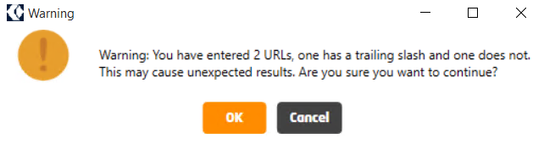
Next let's say we also have user folder paths we need to fix to point to their OneDrive folders.
IMPORTANT
MS Office tries to correct links automatically since MS Office 97. When uploading a file to SharePoint, mapped drives and local paths such as C:\ or P:\ links typically will automatically change from Screenshot A below to Screenshot B
References:
https://support.microsoft.com/en-us/help/328440/description-of-link-management-and-storage-in-excel
https://support.office.com/en-us/article/undo-automatic-formatting-54eba206-110c-445a-89f1-c4eb67a36bd4
"For example, if the linked file C:\Mydir\Linked.xls is dependent on C:\Mydir\Files\Source.xls, the only portion of the path that is stored is \Files\Source.xls."
Screenshot A
Source File: (before uploading to SharePoint)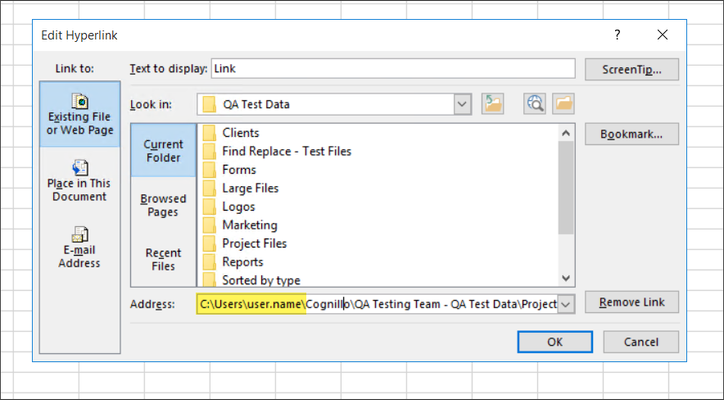
Screenshot B
Source File: (Source File: (after saving in Excel))
You will notice the slashes are changed and it becomes a relative path.
Depending on the migration tool or process used to upload the files,If the paths do not change
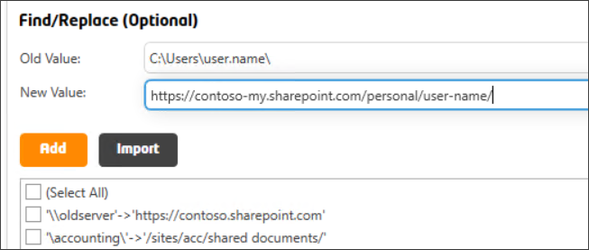
(If the path in the SharePoint site still shows the mapped drive letter as in Screenshot A above)Then set values as below:
Old Value = C:\Users\user.name\
New Value = https://contoso-my.sharepoint.com/personal/user-name/
If the paths changed automatically
(If the path in the SharePoint site still shows a relative URL now as in Screenshot B above)
Then we would replace these as standard http/https links and do a separate job for these by skipping step #7 above (do not exclude links with forward slashes '/' ).
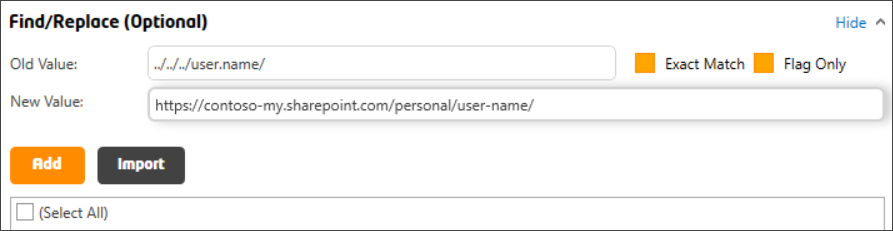
Then set the values as below: (in a NEW Job)
Old Value = ../../../user.name/
New Value = https://contoso-my.sharepoint.com/personal/user-name/
This would then be standard URLs to fix in SharePoint, see How to Automatically Fix Broken Links in SharePoint
- Click "Add" button
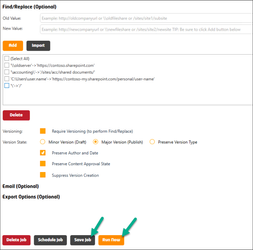
- Finally, we want to now change all remaining backslashes to forward slashes, so we enter below:
Old Value = \
New Value = /
- Click "Add" button
- Now we are all set, you can Save the Job to keep the settings we set up, or just click "Run Now"
EXAMPLE SOURCE: (BEFORE)
Mapping for File Share of user path to OneDrive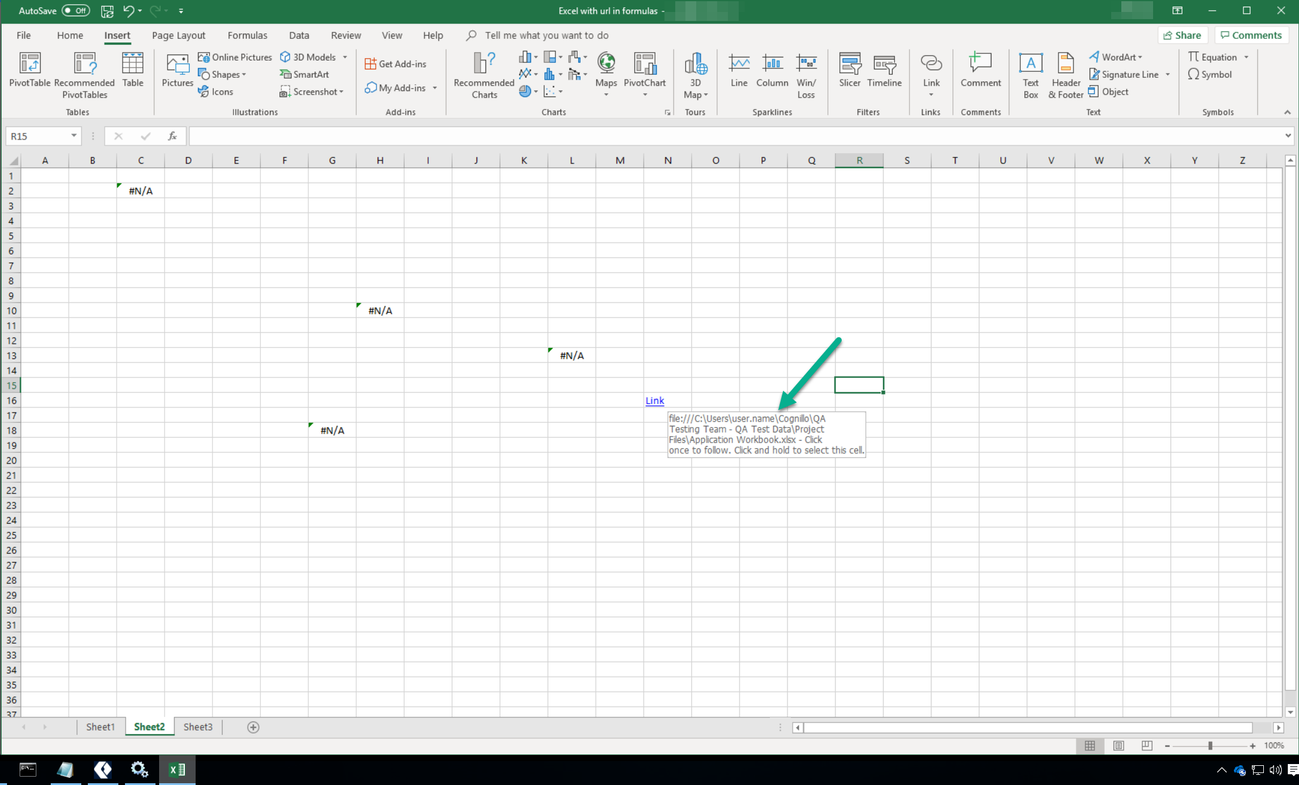
Below: The scenario where SharePoint automatically updates the Drive Letter paths to Relative URLs
Mapping of File Share to SharePoint Site Collection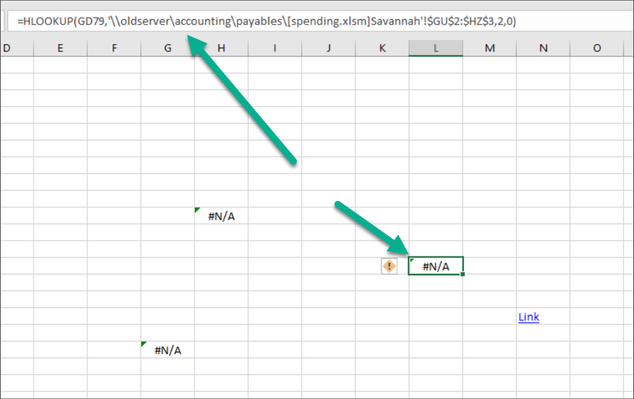
EXAMPLE:
Excluded Link we do not want to change in the same file: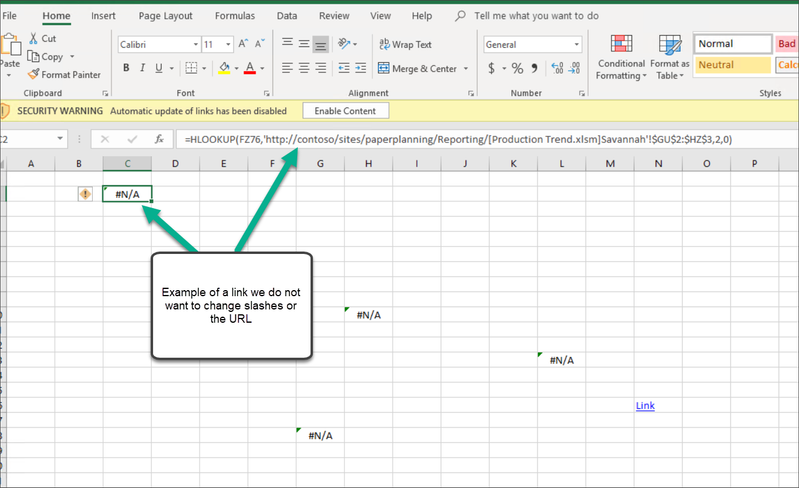
EXAMPLE: (AFTER)
Below are screenshots of what to expect after replacing the links using SharePoint Broken Link Manager.
File Share path updated to SharePoint site collection: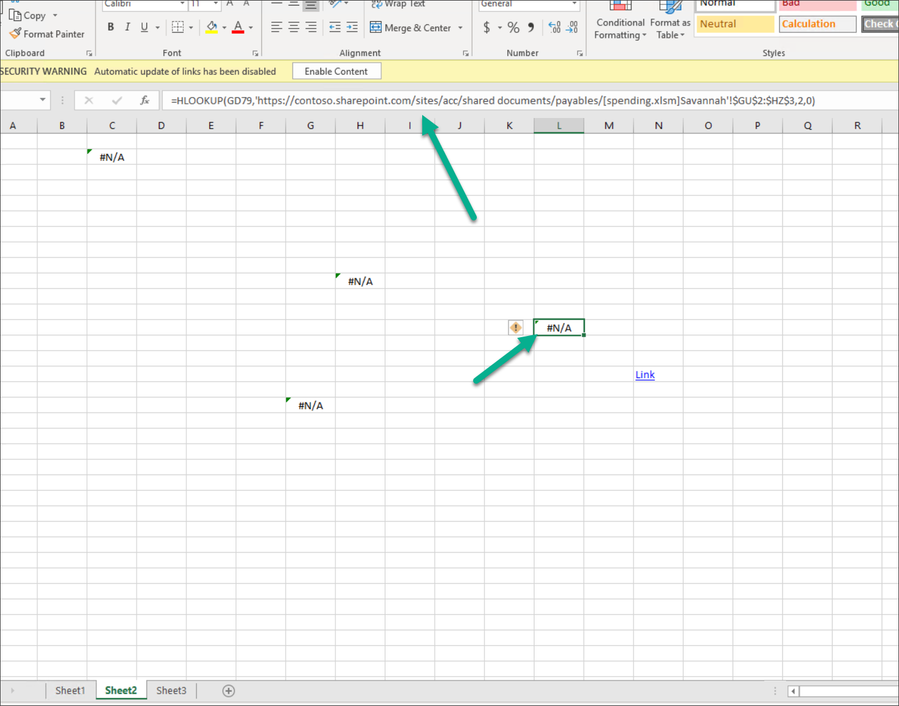
Example below we changed from local path to a user OneDrive path:
Example: "https://contoso-my.sharepoint.com/personal/user-name" as user OneDrive path.
Related articles
©2018 QiPoint
2500 Plaza 5, 25th Floor
Harborside Financial Center
Jersey City, NJ 07311
http://www.qipoint.com
Microsoft, Windows, SharePoint, and the SharePoint logos, are either registered trademarks or trademarks of Microsoft Corporation.